
How its Made: Screenprinting Edition
Among the many numbered services we offer at Pewter Graphics, screen printing is perhaps one of our most popular selections. Screen Printing, or rather-Silk Screen Printing, is an old print making technique that originated in China in the Song Dynasty Era (960-1279) and then later made its way to Europe in the 18th century. Due to limited trade in the silk industry, it did not pick up until the 1900s and then was developed further at that time to be used in art and advertising.[1]
The process is a complex one, involving an artistic eye, a skill with ones hands, and an attention to detail. We spent the afternoon with one of our skilled silk screen printers and learned the general process so we could share it with you! This way when you make an order with us you can imagine just exactly the process your garments will go through!

Step One:
The first step is to select the screen size you will be printing with. Various sizes are better for different types of materials. The screen is essentially a piece of silk pulled tightly over a frame. The size of screen refers to how wide the pores or mesh is that is pulled across the frame.
The bigger the holes in the mesh, the more ink is able to get through the screen and onto the garment. Selecting the right screen can make or break your project as the wrong type of screen can leave a pixelated appearance to the print.
When you run your hand over a screen you can feel the difference between the different sizes. It’s softer and smoother the tighter the mesh is.
Step Two:
Upon selecting your screen, the next step is to coat it with an emulsion. This is what your image will be burned on in the next step. The emulsion we use is a vibrant blue and almost looks like paint; it’s important to wear safety equipment while handling the chemicals! Gloves, masks & goggles are a must!
The tool used to apply the emulsion is a metal trough, about the same width as the screens inner frame. One side is bevelled or sharpened and the other is not. Upon filling the trough you want to carefully angle it against the screen and gently drag it up, angling it so the emulsion coats the entirety of the screen, once it’s coated you flip your trough and use the sharp edge to smooth your work and pull any excess emulsion back into the trough.
Then you flip your screen and repeat this step on the other side so that each side is nicely coated.

Following it being coated, the screen needs to dry and so it gets sent into a dark room to dry off via fan and gentle heat.
Step Three:
About an hour or so later when the emulsion has dried, your screen is ready to have the image you will be printing ‘burned’ onto it via UV light. You must carefully tape your transparency of your desired image down onto the light table, ideally facing away from you and upside down so it will be placed correctly on the garment.
Any black parts of the image should be dark when held up to the light.
After taping down the image, you take your freshly coated and dried screen and place it down on top of the image so the silk is flush against the light table. In our case, we clamp the screen down to the light table but some tables use suction to keep the screen in place, then the light table is turned on and left for about two and a half minutes.
The UV light hardens the emulsion so that only certain parts of your image allow ink through and print the design.
Following the two and a half minutes, the image needs to be sprayed with water and then taken to get pressure washed to remove the parts of the image you don’t need. Then the screen must be dried again and taped along its edges to avoid ink spilling through along the space between the emulsion and the frame.

Like magic the image starts to appear on the screen after sitting on the UV light table.
Step 4:
Next you must select the surface you will be using, by which we mean the board that the garment will be placed on before being pressed under the screen.
Generally the surface board will be covered in a sticky sort of paper to allow it to grip the surface and stay firmly in place while printing.
The machine that holds the screens is on a carousel with arms that rotate. As we are a small operation, ours here at Pewter Graphics only has four arms and is manually operated so it allows for four different screens to be used and rotated through at a time but some machines are much bigger with arms that are all automated.

Step 5:
Now we start getting into the really fun parts, we get to pick our ink colour and mix the ink!
I was surprised to see how thick the ink is before use. It required mixing before it could be used in order to make it more pliable.
Let me tell you, mixing the ink requires some strength and stamina! After mixing it up a bit, you need to add a softener or a reducer to it to make it even more malleable than your mixing already had.
Different types of inks are used for different types of materials, in our case we were printing on a cotton T-Shirt so we used the appropriate type for that.

Step 6:
We then select our paddle that we will use to drag the ink across the screen! We want to make sure the paddle we choose is long enough to cover the image from end to end with a little extra room on either side just in case!
Step 7:
We lay the ink down the screen, eyeing the correct amount takes practice and I generally deferred to the expert before proceeding!
After the ink is evenly distributed the length of your desired image, you take the paddle and use it to press and drag the ink over the image with the screen slightly lifted in your other hand. Then you press the screen down before resetting your paddle and dragging it across again but this time with significant power behind it!
Playing with the ink is satisfying and coating the image is a fun process! After you finish pulling the ink across you lift your screen and the image left behind is revealed! It will be light at first as you will probably have another coat or two to lay down before you finish!

Step 8:
Heat it up! After your first print on the shirt you spin the arm around to your heater where you will cure the ink before proceeding to the next layer.
It’s important to keep a close eye on it so it doesn’t burn, 300 degrees will cure it but for your first layer you can get away with it being a little under!
Following this you need to let it cool down a bit so the image isn’t tacky when you start printing again!
Step 9:
Before hitting your garment with another layer of ink, you want to make sure nothing has shifted and that the image is lined up properly still so it that the second layer goes on cleanly.
I discovered quickly that it takes a trained eye to determine this! It’s difficult to tell at a glance!
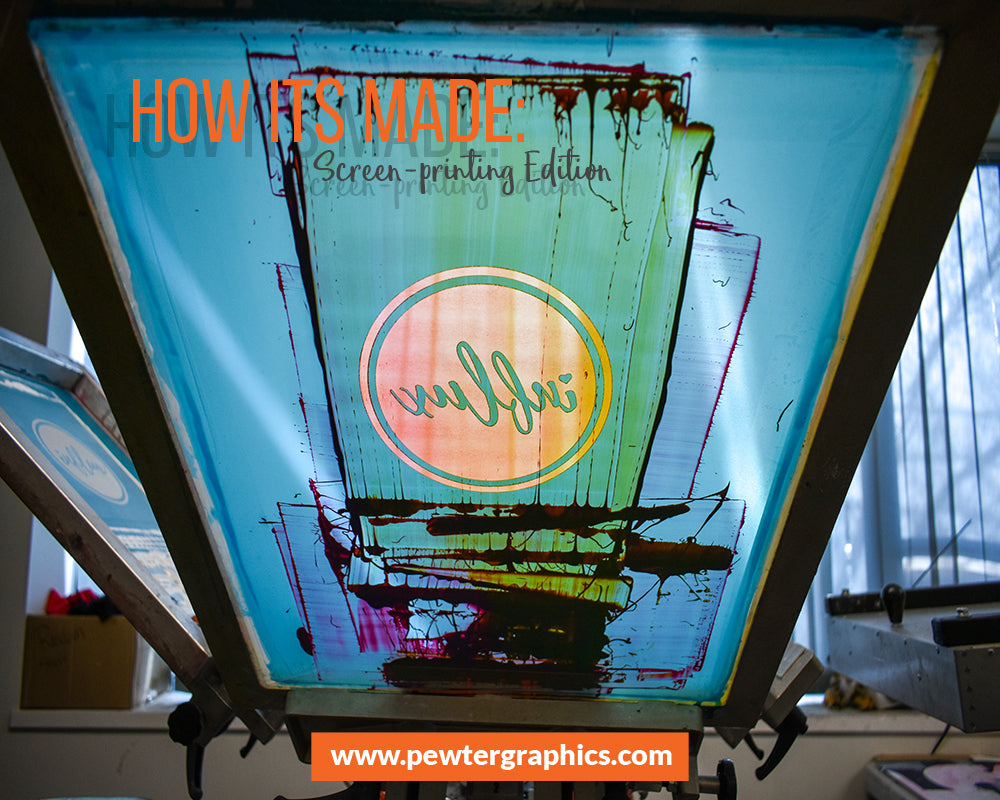
Once you are sure it’s lined up still, you can hit it again with another coat of ink! You can do some fun things with the ink if you really desire to!
Check out the sunset inspired ombre we did below!

Step 10:
Once you’ve layered it to the level you require, you cure the ink to the 300 degrees we mentioned before! Then you take it off the machine and let it cool! Then voila! You garment has a snazzy new print!

Step 11:
But don’t forget clean up! Excess ink gets reused if possible, or recycled! Then we take the screen to be cleaned and use perhaps one of the most fun tools of the job, the pressure washer!
After suiting up in safety gear, gloves, masks, goggles, & ear protection (the pressure washer gets loud!) you are ready to get cleaning!
The first step is to spray it down with a cleaner meant to loosen the emulsion, you give both sides of the screen a scrub and then it’s the pressure washers turn! It’s incredibly satisfying watching the emulsion get peeled away!
After the screen appears clean there is a second spray meant to remove the “haze” of the image that the ink leaves behind on the silk, give your screen a spritz and then back to the pressure washer!
The final step is the spray it with a degreaser (I was surprised how nice it smells and then learned it’s because it’s made from essential oils!) and then your screen is all squeaky clean and ready to dry off before being used again!
And there you have it!
This is just a simple step by step for a basic job and doesn’t cover some of the more complicated steps that can be involved or the finer details of screen printing but we hope it gives you a solid understanding of all the work and care that goes into making your custom products when you contact us! All the work that goes into setup and print are why larger jobs are actually a better value to complete for us and you!
Check out our website www.pewtergraphics.com for all your custom promotional needs!
[1] http://www.visual-arts-cork.com/printmaking/screen-printing.htm